
Now that we have our basic shapes, we need to create the building blocks that our image will be based upon. We’ll do that by stroking the paths we’ve created, and then filling them with a solid color.
Depending on how obsessive-compulsive you want to be about this process, you’ll want to keep each solid-color fill and each stroked border on its own layer. This will make editing much easier on you later.
Before you start stroking paths, decide what kind of brush you want to use. Find a path that forms a major portion of the image, and stroke it several times with different brushes until you find what you want. (Undo is your friend.)
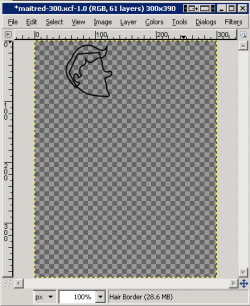
Here’s how to stroke each of your paths. Create a new layer for what you’re about to outline. I generally name this whatever the path represents, plus “border.” (Or, plus “detail” if it’s just an outlined area that does not need to be filled in–such as the Maitre d’s eyes, mouth, and ear.) So if I were starting on the Maitre d’, I might create a layer called “Head Border.”
Select this layer, and then flip back over to your Paths tab. Find the path you’re going to work with, and right-click it. Select “Stroke Path…” from the menu. You’ll be given an option to create a basic stroke line or use an existing brush.
Again, hopefully you’ve already figured out what you want to use as your main brush. I stuck with a 2 pixel, solid-black line for my 300×390 pixel image.
You’ll want to do this for each path that needs its own outline. Note that some paths won’t need a full outline, and this is where putting each border on its own layer really helps out. Use your free select tool to select the portions you don’t want and erase them. No need to avoid all of the other lines in the image–just erase lines on the specific layer you’re dealing with.
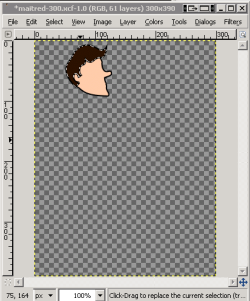
You’ll also want to fill your paths with a color. (Note that for shading, you may want to create paths that aren’t stroked at all, only filled.)
Again, create a new layer for what you’re about to fill in. I generally name this whatever the path represents, plus “base.” So I might call this layer “Head Base.”
You should generally put this under the corresponding border layer that you just stroked, since the center of the stroked line rests in the center of the path. If you put your fill color over your stroked outline, then you’ll be covering up portions of the outline.
Select the layer you just created. Set either your foreground or background color as the base fill color you want to use. If you chose good colors when working in Inkscape, your color picker tool will be very useful here in conjunction with the “Rendered SVG” layer that GIMP imported.
Then, flip back to your Paths tab. Right-click the path you want to work with, and click “Path to Selection.” This will set your selection to the outline of the path. From here, right-click on your image, go to Edit, and click “Fill with FG Color” or “Fill with BG Color.”
Once you start stroking and filling paths, you may need to rearrange your layers. Again, this is why we created separate layers–so we could work with the way the image is composed without having to retrace our steps.
As you work stroking and filling, make sure to save your work periodically.
When you’re done you’re going to end up with pretty much the same thing you had in Inkscape. But wait, there’s more!